If you want to send your members a custom message when canceling a class — for example, to provide a specific reason or include additional details — this workaround lets you do so safely.
By default, when you cancel a booking, the system automatically sends the Cancel Appointment Confirmation Message. To prevent this, you’ll first disable the standard email, then manually message your booked members before completing the cancellation.
Step-by-Step Workaround
Follow these steps to send a custom cancellation message without triggering the system’s standard cancellation email.
Step 1: Confirm the Cancellation Email Is Disabled
-
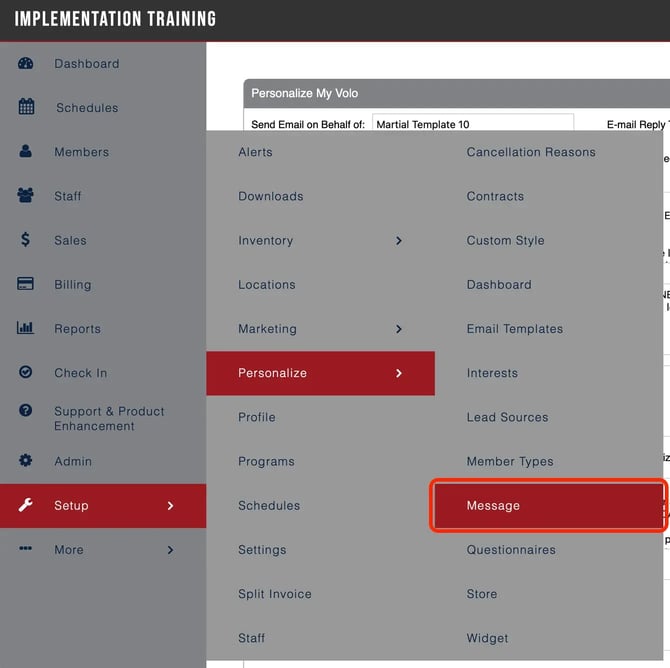
Go to Setup → Personalize → Message.
-
Locate the Cancel Appointment Confirmation Message in the list.
-
Make sure it is turned off.
-
If it’s still active, toggle it off and save your changes.
-
This ensures that when you cancel bookings later, no automated email will be sent to members.
Step 2: Message Booked Members Manually
-
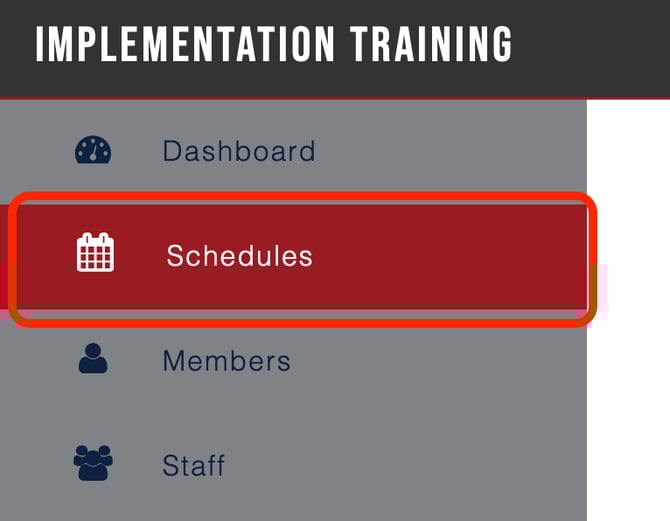
Navigate to Schedules.
-
Select the specific class you’re canceling.

-
From the class details page, click Send Message in the top left corner.
-
Choose the Email Member(s) option.
-
Write and send your custom email with any relevant details (e.g., reason for cancellation, reschedule options, or alternative classes). Note: Please don't include emojis as it can cause issues.
This step allows you to fully control what members receive and ensures consistent communication.
Step 3: Cancel the Members’ Bookings
-
After you’ve sent your custom email, you'll be back on the class screen.
-
Select the affected members.
-
Click Cancel to remove their bookings.
Because you disabled the standard cancellation email earlier, no automated messages will be sent when you complete this step.
Why This Workaround Helps
This method gives you full flexibility over your communication. It ensures members are properly informed about cancellations while avoiding duplicate or conflicting system messages.
Summary / Next Steps
To recap:
-
Turn off the standard cancellation email first.
-
Message members manually with your own custom email.
-
Cancel the bookings after messaging to complete the process safely.
If you need to reinstate automated cancellation emails later, simply return to Setup → Personalize → Message and toggle the setting back on.